Showing posts with label Home made. Show all posts

Thursday, September 12, 2013

Pan Fried Tofu with Soy Sauce Dip

I love going to the Chinese Market on weekends because i can taste hell a lots of free food samples :P . I know i am such a foodie. Why i love to taste samples because , i come home and try them when i am free.Last week when i went were there i happened to taste Fried Tofu , they were delicious . 

Though i am not a big fan of Tofu , I thought i should try it . The Tofu i ate in the Chinese Market was totally different , it was just dipped in the  Batter and fried. So i took that idea and made my own version of Pan Fried Tofu .( Health Conscious :) )

INGREDIENTS:

Hard Tofu - Sliced into square 
Cornflour - 3 TBLSP
APF - 1/2 Cup
Corn Flakes - 1/2 - 1 Cup ( Crushed by hand)
Salt - To taste
Pepper - 1 TSPN
Chili Flakes - 1 TSPN
Fresh Coriander Leaves - Chopped ( only the leaves 2 TSPN)
Water - To make the batter
Oil- to fry


I had made it as an even Snack . It was so stomach filling . The best part of making this is , tofu need not be marinated . Just dip in the batter , roll it in the corn flakes and fry them . They are done .

INSTRUCTIONS:


  • Slice Tofu into Medium Thin Squares .( Or the shape you want).
  • Combine APF , Corn Flour , Pepper , Salt , Chili Flakes , Chopped Coriander Leaves .
  • Add water little at a time and make a Medium Thick Batter.
  • In another plate crush the cornflakes and leav it aside.
  • In a Non-Stick Pan Add some oil . Allow it to heat .
  • Once the oil is hot and ready , Dip the Tofu in the batter and then in the crushed cornflakes and fry it in the oil.
  •  Fry it till it is golden brown.
  • When it is done , keep it in the Paper towel to make sure excess oil will be absorbed.
  • Continue with rest of the Tofu.


For the Dip:

INGREDIENTS:

  • Soy Sauce  -  1/4 Cup
  • Vinegar  - 1 TSPN ( I used Apple Cidar Vinegar )
  • Chili Sauce - To the Spice level
  • Sesame Seeds - 1 TSPN
  • Scallions - Chopped - 1 ( Finely Chopped)
  • Red Chili Flakes - 1/2  TSPN

INSTRUCTIONS:

  • Combine all the ingredients mentioned .
Note for the dip :

 Dip is tastier when made fresh .
Good to keep in the fridge for 2 -3 days.


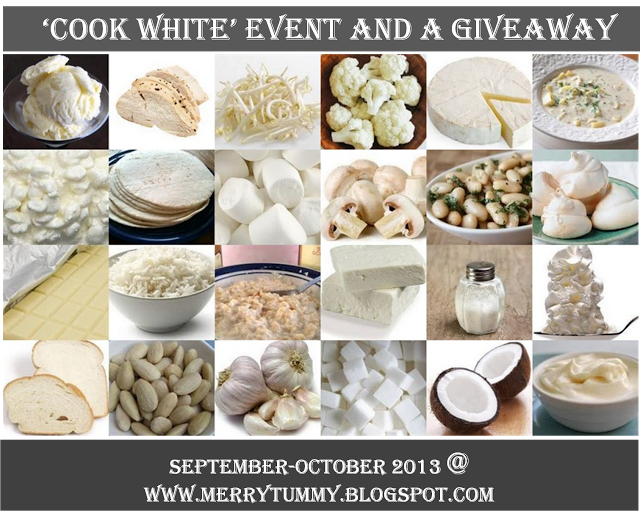
Linking the event to Cutchikitchen , Cook with white at Merrytummy


Thursday, May 30, 2013

Go ' Nuts' with these Donuts

Isn't these little donuts looking cute ? They taste good aswel . These donuts brought back my  childhood memories. Every year , even now there will be a three day Indo - Srilankan Carnival / Fair happening near my house in convention center . So we used to go as a family . At the entrace there will be a donuts stall . Freshly fried mini donuts with simply dusted sugar on it . Ohhh yummm. There will be always a big line waiting to buy these donuts. We never miss to buy these donuts anyways.. They were soft , crispy and tastes soooo good.  

This month's challenge at Eggless Baking Group  was suggested by  Jayanthi from Sizzlingveggies . Jayanthi had suggested Donuts. It was quite challenging to make these Eggless Donuts. But it was fun to make . I wanted to make the replica of the Carnival Donuts , so i  just fried the Donuts and sprinkled the sugar on it . Later removed the excess sugar .

I searched so many recipes online , but was not satisfied with any , then came up with my own.    Initatally i thought of baking the donuts and then i fried them . I baked few donuts too and couldn't take a pictures of baked donuts.


Ingredients:

APF - 2 Cups + little more for dusting
Instant Yeast - 1 TSPN
Milk - 1/2 Cup ( Warm milk or Room Temperature)
Sugar - 3 TBLSP
Vanilla Essence - 1/2 TSPN
Salted Butter - 2 TBLSP
Mashed Banana - 2 TBLSP

Oil- To fry
Sugar -  To sprinkle


Instruction:

1.  In a large bowl mix all the dry ingredients together with 2 TBLSP of butter.
2. Now add Milk , Mashed Banana and Vanilla Essence.
3. Using a dough hook knead everything together  aproximately for 7-8 minutes. It helps for a fluffy and soft donuts.
4. Place the dough in a clean bowl , close it with a wet and clean towel . Allow it to raise for an hour.
5. Once the dough is doubled , Punch it and release the air.
6. Roll out  the dough , Cut it using a round cookie cutter.
7. Arrange these Donuts on a greaced baking tray.
8. Allow it to rest for another hour by covering it with a wet towel.
9. Heat the oil in a pan , once the oil is hot drop these donuts and fry them.
10. Once these dounts are golden brown , remove it from the oil , drain the oil and place it on top of the paper towel.
11. Put some sugar in a clean box  and place these warm donuts .
12. Give it a good shake .
They are ready to eat . Donuts should be eaten little warmer .


The same dough can be used for the Baked Donuts too !!!! I did bake ,but before clicking a picture baked donuts were over . 


 Linking the post to Shruti's Sweet Celebration


Monday, March 18, 2013

Homemade rolling fondant


Fondant - Does any one know what fondant is ? Let me elaborate it . Fondant is a dough like consistency , where it is perfect to be covered on a cake , to make cake borders, decorations , to make  flowers , animals , trees and other figures.. It gives you a nice and neat finish to the cake .
This is my all time recipe i use regularly to make figures and to cover the cake. As i promised that i would write my recipe on my blog i was not able to provide step by step pictures. But i am pretty sure
the instructions will be easy and if you guys have any doubt i am ready to guide and help you all.

Ingredients.
  
Unflavored Gelatin - 1/2 TBLS + 1 TSPN
Cold Water - 2 TBLS
Liquid Glucose - 1/4 Cup
Unflavored Shortening /Unsalted Butter - 1 TBLSN ( I used butter , it gives good taste)
Glycerin - 1/2 TBLSPN
Icing Sugar - 4 Cups ( Have some extra Icing Sugar ,it will be useful when working on the counter)
Flavoring ( Vanilla ) - 1 TSPN (It is not necessary to add flavoring if you do not want to )


 1. Combine gelatin and cold water leave it for few minutes , you will see it will turn thick.
2.Then Place the gelatin mixture in top of double boiler and heat and stir until it is dissolved.
3.Add glucose, mix well. Stir in the butter; just before completely melted remove from heat.
4.Add glycerin and  flavoring .
5. In large bowl, place 2  cups of icing  sugar; make a well. Pour the lukewarm gelatin mixture into the well and stir with a wooden spoon ( i use my hand ), mixing in sugar and adding more, a little at a time, until stickiness disappears. Do not use add more icing sugar , the consistency will go wrong . and the fondant will start to break.
6. Knead in remaining sugar. Knead until the fondant is smooth, pliable and does not stick to your hands. If fondant is too soft, add more sugar; if too stiff, add water (a drop at a time).
7. You can use the fondant immediately or store in airtight container at room temperature until needed.
 
You can store fondant for two or three months , if  it is refrigerated ( remember store it in a airtight container. Bring to room temperature before kneading. Do not freeze. When ready to use, knead again until soft.
 
Notes -
Though the recipe says use  4 cups , i used littled lesser , so be very careful in adding icing sugar.
If you are making figures , dust some corn starch on the counter , then work on it , it helps the fondant not sticking to the counter and in the hands . 
Once figures are made , DO NOT REFRIGERATE THEM . Keep it under the fan till they are stiffen.
Once the figures are stiffen , Put them in an air tight box and store .
You can use tylose powder too , to stiffen the fondant figures.
 

                                         Enjoy Making Figures with fondant.


Friday, March 8, 2013

Home Made Salted Butter Cream


This Tastes sooooo good. Once you have a bite , you''ll keep eating the cake.This is sooo tempting.
That too chocolate cake with salted butter cream frosting is a heaven.

Ingredients :

Icing Sugar - 150 gms
Butter  - 100 gms  ( Room Temperature)
Fresh Cream - 1 TBSP 
Caramel Sauce - 1/2 Cup (Room Temperature)
Salt - 1/2 TSP

Instructions :

1. Beat the Butter till its soft and fluffy.
2. Add Icing Sugar and  salt , Beat them well .
3. Once the butter and sugar is incorporated add the Caramel Sauce.
4.Once everything is mixed add fresh cream and beat well probably for half a minute.
5. Do not over beat the butter cream.

Pipe the Butter Cream in your Cakes/Cupcakes as you wish
You can store the Butter Cream in an air tight box for a month in the refrigerator.


Hope you enjoy the Divine taste.
I link it to Cooking like a celebrity chef , spotlight ,Cuisine Delight


Tuesday, March 5, 2013

Homemade Salted Caramel Sauce


I have never imagined that i would do a Salted Caramel Sauce at home. Once when i was going through the google images about the Chocolate Cake with Caramel butter cream frosting  , i was tempted to give it a try ;)  .. When i was making the Caramel Sauce , the house smelled soooo good.

This is the recipe for the Caramel Sauce :

Ingredients you need :

Granulated Sugar - 1 Cup
Salted Butter - 6 TBLS ( Room Temperature )
Heavy Cream - 1/2 Cup ( Room Temperature )


 For those who are going to do it for the first time , here are few tips to be noted:
  • Try to use a big Heavy Bottom Saucepan.That will be easy to handle the sauce because when you add the butter and the cream , the caramel will bubble up badly.
  • Keep Stirring the sugar initially to help it to melt at the beginning, but stop stirring it once it has completely melted .It is just to keep it from seizing.
  •  The caramel should be  reddish brown in color and it should have just started to smoke.This is when you add the butter into it.

 Instructions :


 1.Add the sugar in a Large Heavy Bottom saucepan .Heat the sugar in a  medium high heat. Keep stirring it.Once the sugar starts to melt  , you will be able to the sugar starts sticking on the sides and it will form clumps. It just happens, do not worry about it . Keep whisking it and it will melt down completely.

2.Once the sugar is completely melted ,it will reach a amber color with a beautiful aroma.  This is the point where you have to keep watching the caramel very carefully as it can go from perfect caramel to burnt in a matter of seconds.

3. This is the stage when you add the butter. Be very careful at this stage because the butter bubbles up.Keep stirring the caramel mixture till the butter is totally melted.


4. Once the butter is totally melted , Remove the saucepan from the heat . Add the Cream into the Caramel. Whisk it thoroughly until Cream gets incorporated with the Caramel.


5. One the Cream is incorporated completely , that is the sign that your Salted Caramel Sauce is ready for use.....let it cool to the room temperature.
 
Once it is cool the Caramel Sauce tend to go harder than before. You can store the Sauce up to 2 weeks. If you are going to use it , just warm it up a bit .